Tuesday, January 2, 2024

(Super Elegant) Fleece Dress - SEFD - a new clothing hit

 This is my creation: 

This was my inspiration: from Burda 9/2022, mod. 119, size: 40.


My aunt gave me this ˝difficult˝ fabric for free (she loves to sew and I love to sew and we had a fabric swap or to be honest she just gave me some fabric, I didn't give her any fabric back, but that's because she doesn't sew as much as she used to and I sew more than I used to). It's fleece with a very colourful and busy pattern. 

I thought of making the most typical thing – a cardigan or a sweater. BUT … I was inspired by Burda magazine. I saw the two pictures of this dress pattern in the magazine and I got my ˝brilliant˝ idea. Let's make a super elegant dress out of this ˝difficult˝ fleece. It should be an essential piece of wardrobe, like LBD (little black dress) or a white T-shirt. It should be a new clothing hit - SEFD – super elegant fleece dress – it's soft, warm and elegant at the same time. It keeps you warm in winter time and you can look great instantly. I'm not kidding, I'm very serious, it is extremely comfy.


I think that you can take any old fleece and merge it with a super elegant dress pattern and you'll have a winter winner for sure. It sews wonderfully and fast. Beware: when you make neckline facing, don't use fleece, use something else. using fleece would be too bulky – I have done this mistake once in my life and I'll never do it again.

Some details:


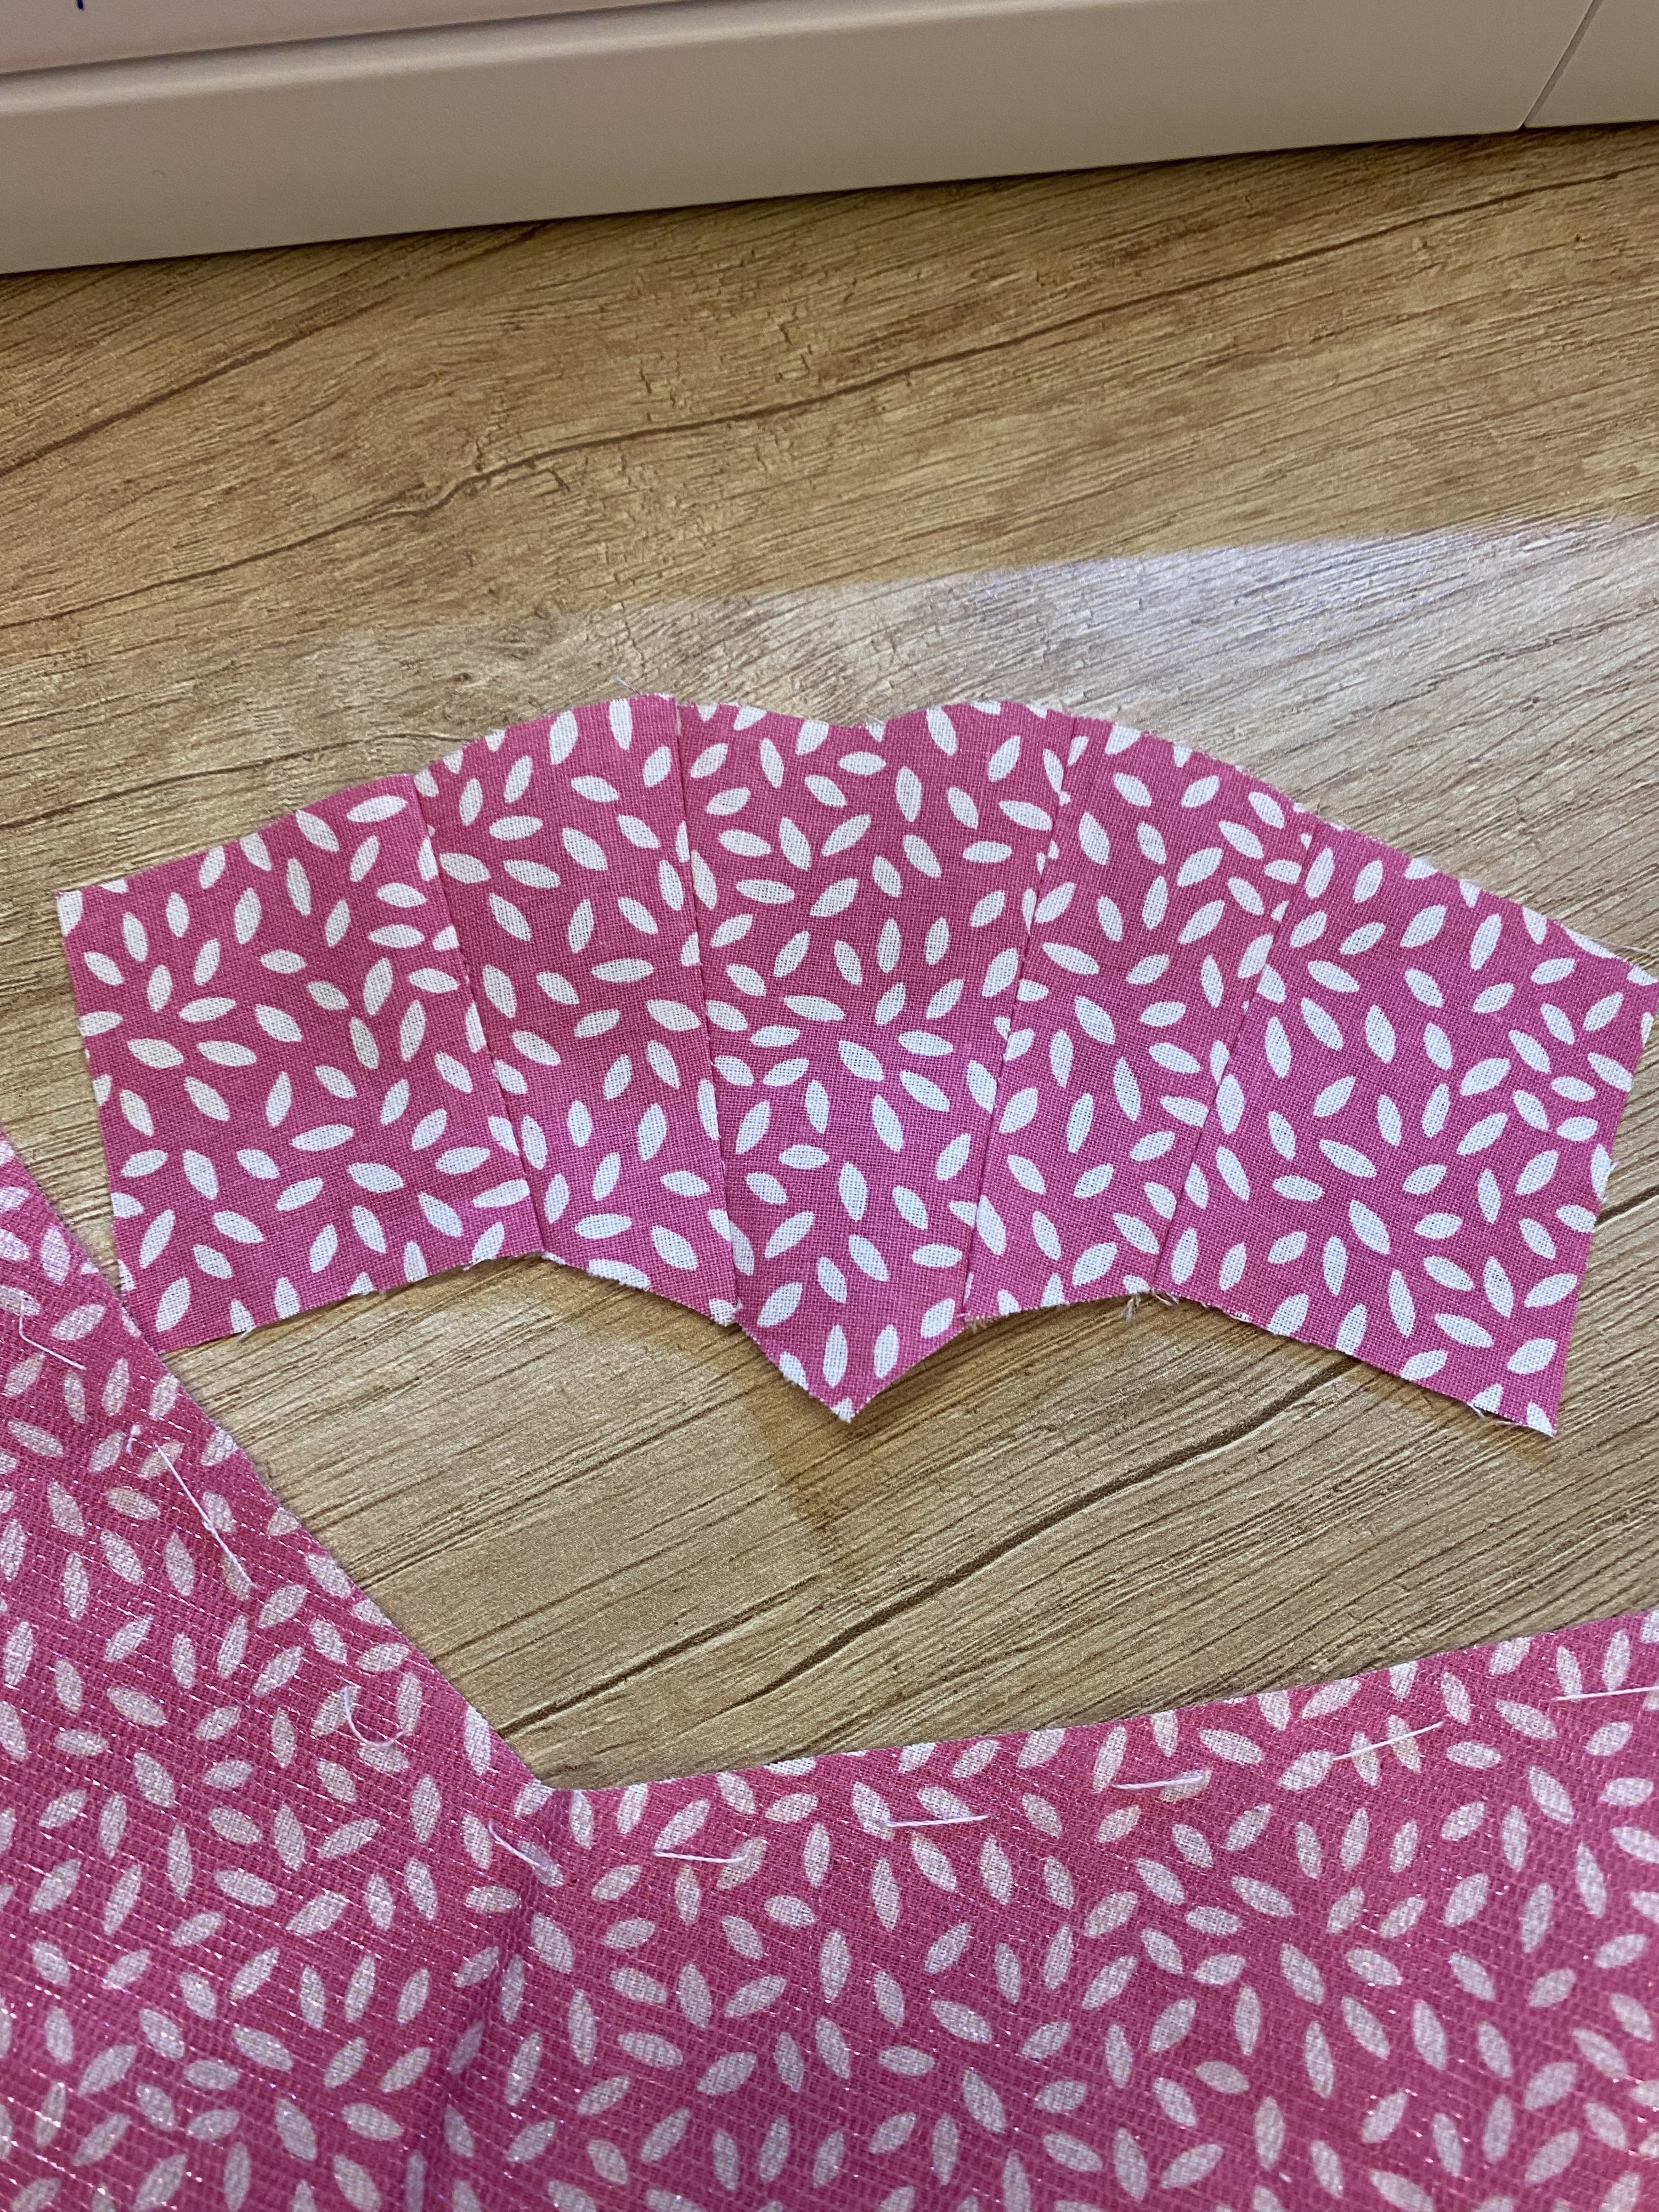
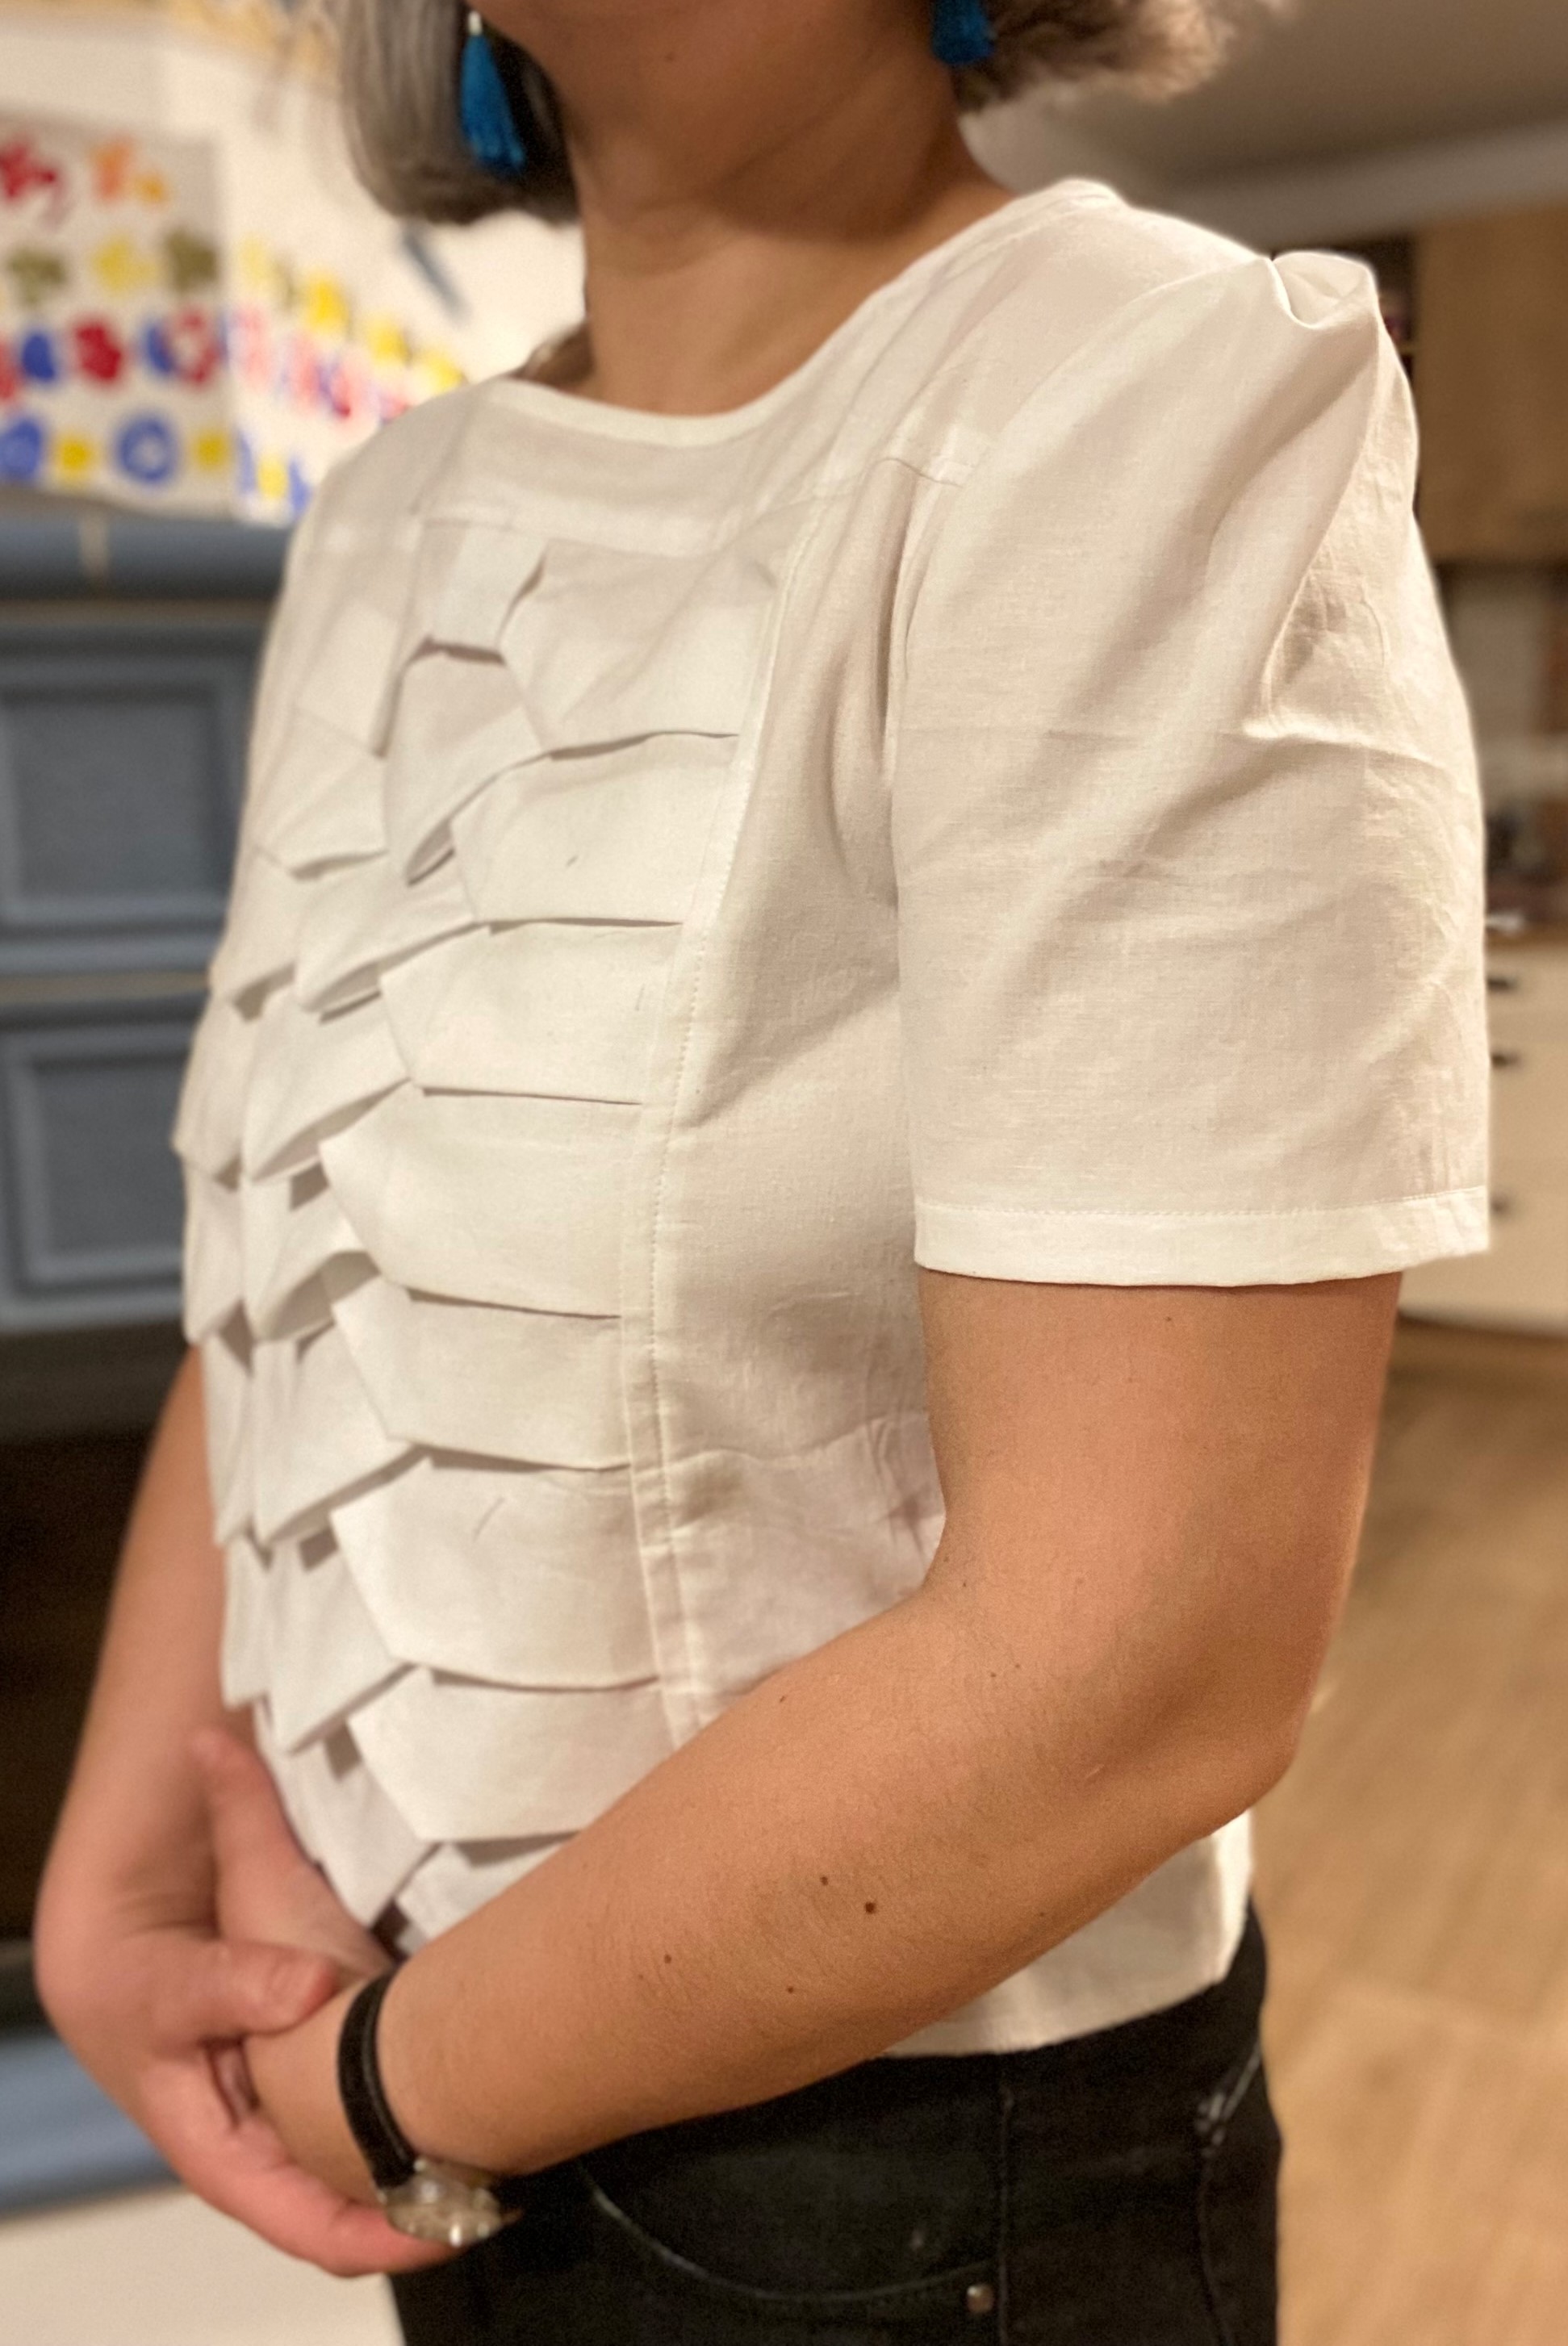
I decided that the seams (on sleeves, neckline and skirt bottom) should imitate a blanket – so I made the seams quite wide with a twin needle. I used an ordinary zipper because I had no invisible zipper at home. I didn't change the pattern a lot, I just tweaked it. I changed the front folds, the first ones looked like I had a boxy belly, I played around and decided on those that you see. I took in the back before I sewed in the zipper - for 2.5 cm on both sides on top. (When the zipper was finished, I realized I should do this down the entire back bodice, because I'have done it only at the top back part). Why does Burda make so much room at the back? I have no idea, maybe for broad shoulders and back. I got used to this problem, so I'm not even surprised by that anymore.

Maybe I should lengthen the top bodice to reach my belly button (because now it's like 3 cm above my belly button), I'm not sure. I shoud try this once, because it feels a bit strange - like an empire dress. 

Behind the scene photos:


Some more photos:


That's it. Make yourself an EFD (Elegant Fleece Dress) every winter, you'll feel great in it!


Wednesday, August 23, 2023

Barbie-mania

Oh, yeah, Barbies! I'm a big fan of Barbie dolls. I probably started sewing and creating because of their beautiful, pink, plastic, shiny, wonderful world. I used to look for everything connected with Barbie world when I was a child because everything was just so attractive. But it was also slightly unreachable. Slovenia was a small post-communist and socialist country in my childhood, a part of Yugoslavia (YU consisted of 6 smaller republics (Serbia, Croatia, Bosnia, Slovenia, Macedonia, Montenegro) and 2 (less-independent) states: Kosovo and Vojvodina). 

Everything nice was coming from Germany, Austria, Italy, also Czech Republic and Slovakia and Hungary. Everything what was precious and valuable was in German marks and it was quite expensive. So we used one currency to buy and sell in our country and German currency to save money in and to buy more expensive goods like cars, kitchen appliences and Barbies, yes, Barbies.  My mum bought some for me when she was able to travel abroad as part of excursions for teachers. They were probably from China but at that time even those toys were of relatively good value. I didn't have any original Barbies - in my memory they were so expensive, like 99 marks = 99 euros. 

I remember looking through a catalogue of toys which was in German. I could never get those pink houses, cars, closest, scooters, beautiful sparkly clothes etc. So I created my own from boxes, fabric and so on. Things were not pink but I was able to play and to create. I took good care of any Barbie clothes that I owned and copied them to re-creat my own clothes for Barbies. (I should show them once before my children totally destroy everything.)

Anyway, enough of memories and nostalgia. I'm getting old. 

Here are 3 Barbie dresses and two patterns I've made recently (The first one and the third one are made after the same pattern, the second one is a different pattern.) Here I'll show just pictures and I'll try and make PDF files to download for my next post.

#1: The Blue Sparkly dress


#2: The Pink Cotton dress


The process of making:


Here is the original file I found on the internet, but it's a .jpg file, so not very useful: Simplicity 4719

 https://drive.google.com/drive/folders/1zNJn0I7Mn7pZc4Z1mNKTYUHMLuao-khv?usp=sharing

(I hope I'll publish it in PDF soon.)

#3: The Pink Boucle and Satin dress - the latest one


(This Barbie is like my best one that I own and she is over 30 years old.)

Useful site for making Barbie clothes:

A lot of great Barbie clothes with PDF patterns

Saturday, May 20, 2023

BASIC WHITE T-SHIRT/ BLOUSE WITH CANADIAN SMOCKING

Yep, I'm still obsessed with smocking.


I had this idea for some time in my head, so I just had to make it real. 

My idea is actually very simple: 1) take a simple basic pattern of a T-shirt/ blouse (woven fabric like cotton or linnen) and 2) then take out of the front part a rectangular panel; 3) this rectangular panel is then used for smocking – it has to be transformed, of course, it has to be lengthened. For this type of pattern (I call it arrows- arrowed pleates) it has to be a lot longer and just a bit wider. So when you make the smocking it shrinks considerably in length and a bit in width.

I'll give you some numbers. My rectangular panel was: 100 cm x 32 cm which was smocked by using a Canadian/ American smocking. And out of this panel I got a fully smocked piece of 41 cm x 25,5 cm - that was the outcome. I think that I was expecting to get 43 x 30 cm. It wasn't too worrying because I just continued from that point on and adjusted other parts of the blouse.


I used a very simple white cotton (for making  embroidered tablecloths) because I was too stingy to use linen. I wasn't sure if it would turn out OK. I thought that it might be a mess. Luckily it wasn't. After the smocked part was done, I cut out the rest of the parts. There were minor issues: the smocked part shrank a bit more (but not a lot more) than expected/ calculated, the back part was shorter than the front part (?! Jeez), so I just had to add some more fabric there, the sleeves were a bit bigger than the armholes so I had to make some pleats – but, nothing that couldn't be solved.

Like I said: I made the front smocked panel first and after that I cut out the rest of the front parts: upper part, left and right part.


The process of making:


Then I did the same for the back part. Pretty straightforward, right? So, again, when I have the smocked panel, I just need the upper part and the left and right parts to cut and then to sew next to the back panel.


The sleeves had to have small pleats - but - no big deal.


You can see the material up close - basic cotton.

My favourite link for Canadian smocking is by far: Sewing by Anita on YouTube. I love her videos. They present smocking as a simple technique.

I had a small issue, as I mentioned above, that the back part was shorter than the front part when stitching everything together so I just added a strip of fabric:


Problem solved: strip of fabric is added to the back.


All the pictures shown are before washing the garment. I have ironed it several times but I still have to wash it. So you can even see chalk markings (in blue) from the wrong side of fabric (because the fabric is so white). 

When I began imagining and constructing this blouse I knew that the smocked pattern would be ironed a lot, even though it is kind of 3D. Hence the cotton material.

I'm not sure if I should attach the arrowed pleates discreetly at certain points. I have considered topstitching but I think it would look awful because the pattern is relatively even but not perfectly even. And topstitching it would just show/ underline every uneven detail. I have topstitched side seams of the smocked panel. So ironing the blouse a lot is another solution.


Neckline: was made with my own bias band. I do it my way, of course, I make bias tape and just sandwich the fabric between the halves of the bias tape. I stitch everything by hand and then topstitch everything with a sewing machine.


Bottom seam of the shirt: is still undone to this very moment (you can see it in the pictures if you look closely) but I will probably finish it with bias binding - like the neckline.


The blouse seems a bit boxy. It has no zipper. I pull it over my head. This is possible because I don't have broad shoulders or bust area. It sits nicely. It's a bit on the short side. I considered making it more tailored/ fitted and inserting a zipper but I decided to first see how it looked without it. And I have to wash it which might shrink it a bit. 

I have to admit that this front part is a bit bulky and after wearing it for 8 hours it can get messy - wrinkled, crumpled. But I just gently straighten everything with my hands and wait to get an iron in my hands.

And that's about it. I think I have covered everything I wanted to say.